OpenLayersを使ってみる。[Chapter 41]
OpenLayersのVector Layer class eventについて[Chapter 40] に引き続き、OpenLayersのGeometryとFeatureについて基本を学んでいきます。
この章以降は、
-
どのようにvector layerを描いているか?
-
Vector Classとは?
-
GeometryとFeature classについて → 今回はここ
-
Strategy,Protocol,Format classの使い方
について順番に学んでいきます。
OpenLayers 2.10 Beginner's Guideなる書籍の章立てにあわせて、OpenLayersの使い方を学んでいきます。
Geometry class
ここまで、特にGeometry classについて説明することなくFearture classを使っていましたが、ここでは、Geometry classについて学んでいきます。
Geometry classは多かれ少なかれ私たちがこれまで使ってきたfeature objectの基礎となります。
具体的には、base classとしてFeature.Vector classを使用しています。
Featureに関するGeometry情報を格納するために、Feature.Vector classがGeometry classを使用していることを理解しておかなければなりません。
ではGeometryとは何か?
それは、地理情報を格納するobjectと考えておけば良いと思います。
例えば、
var feature_point = new OpenLayers.Feature.Vector(
  new OpenLayers.Geometry.Point(-72, 42)
);
のように、経度緯度をGeometry.pointで作成しています。
そして、
map.layers[1].features[0].geometry
でfeature[0]のgeometryを取得することができます。
このには、bounds propertyやx, y, そしてID propertiesなどが格納されています。
Geometry class methods
以下はGeometry class methodsです。
atPoint(lonlat, toleranceLon, toleranceLat)
atPoint(lonlat, toleranceLon, toleranceLat): This will return a {Boolean} indicating whether the geometry object is at the passed in lonlat. The lonlat parameter is an {OpenLayers.LonLat} object containing a coordinate to check, and the toleranceLon, toleranceLat parameters specify a {Float} number which sets the threshold for the longitude and latitude, respectively. If a point lies within the threshold of the longitude and latitude, true will be returned—if not, false will be returned. The calculation which determines if the geometry is at the passed in point is an approximation based on the geometry object's bounds.
calculateBounds()
calculateBounds(): Calling this function will recalculate the bounds of the geometry. It does not return anything. If you wish to see the geometry object's bounds, see getBounds().
clearBounds()
clearBounds(): This function will turn the geometry object's bounds object to null.
beforefeaturemodified
beforefeaturemodified: Triggered before a feature is selected to be modified. The listener function receives a feature object which references the soon to be modified feature.
clone()
clone(): This function creates a copy of the geometry and returns a cloned {OpenLayers.Geometry} object.
destroy()
destroy(): Calling this function will destroy the geometry object. Note—if you call this on a geometry object that is already part of a feature object, it will not remove the geometry object from the map.
distanceTo(geometry, options)
distanceTo(geometry, options): Calling this function will calculate the nearest distance between the current geometry object and a geometry object passed in. The options parameter can contain additional calculation options, which vary depending on the geometry subclasses. There is a details option which is a
{Boolean} and can be specified for all subclasses. If details is set to true in the options parameter, this function will return an {Object} containing the distance and x0, y0, and y1,y0 values which represent the coordinates of the two geometry objects. If details is not set (or set to false), this function will by default return a {Number} containing the distance. Take care to mind the units that the map is in.
extendBounds(bounds)
extendBounds(bounds): This function will extend the geometry's bounds, including the passed in bounds object, which must be an {OpenLayers.Bounds} object. If the geometry does not have a bounds set when this function is called, then it will be set.
getArea()
getArea(): Returns a {Float} containing the area the geometry object covers. This function is redefined in various subclasses, but can be called by all subclasses.
getBounds()
getBounds(): Returns the bounds of the geometry as an {OpenLayers.Bounds} object. If no bounds are set, the bounds are calculated. This will return the bounds for a single geometry object—if you want to get the bounds of all the features on your layer, see the Vector class' getDataExtent method.
getCentroid()
getCentroid(): Returns a {OpenLayers.Geometry.Point} object containing the center point of geometry object. This function is redefined in various subclasses, but can be called by all subclasses.
getLength()
getLength(): Returns a {Float} containing the length the geometry object covers. This function is redefined in various subclasses, but can be called by all subclasses.
getVertices(nodes)
getVertices(nodes): This function returns an {Array} of all the points in the geometry object. It accepts a {Boolean} parameter which is True by default, which specifies that all vertices should be returned. If it is set to false, then if the geometry is a Line, this function will only return vertices that are not endpoints.
toString()
toString(): Returns a WKT (Well-Known Text) {String} of the geometry object. WKT is a markup language, similar to HTML or XML, which is used to represent geometry objects. For example, when calling this function on a Geometry.Point object with a coordinate of (-72, 42) would return the WKT string “POINT(-72 42)”. More information on WKT can be found at http://en.wikipedia.org/wiki/Well-known_text.
Geometry class methods FireBug
Geometry class methodsについてFireBugを使って、その動作の確認をしてみましょう。以下のcodeを入力します。
保存先は、c:¥ms4w¥apache¥htdocs¥openlayer¥chapter9¥にしておきます。
ファイル名は、chapter9_ex31.htmlで保存します。
[html]
<!DOCTYPE html>
<html lang=’ja’>
<head>
<meta charset=’utf-8′ />
<script type=’text/javascript’ src=’http://localhost/openlayers/OpenLayers.js’></script>
<script type=’text/javascript’>
var map;
function init() {
//Create a map with an empty array of controls
map = new OpenLayers.Map(‘map_element’);
//Create a base layer
var wms_layer = new OpenLayers.Layer.WMS(
‘OpenLayers WMS’,
‘http://vmap0.tiles.osgeo.org/wms/vmap0′, {
layers : ‘basic’
}, {});
var vector_layer = new OpenLayers.Layer.Vector(‘Basic Vector Layer’);
map.addLayers([wms_layer, vector_layer]);
//Add a LayerSwitcher control and a editing control bar
map.addControl(new OpenLayers.Control.LayerSwitcher());
map.addControl(new OpenLayers.Control.EditingToolbar(vector_layer));
if (!map.getCenter()) {
map.zoomToMaxExtent();
}
}
</script>
</head>
<body onload=’init();’>
<div id=’map_element’ style=’width: 600px; height: 480px;’></div>
</body>
</html>
[/html]
OpenLayersでVector layerを使ってみる。[Chapter 35] と同じcodeですので、詳細は、OpenLayersでVector layerを使ってみる。[Chapter 35] をみてください。
保存後、FireFoxを立ち上げて、http://localhost/openlayers/chapter9/chapter9_ex31.htmlと入力して、Firebugを起動すると、
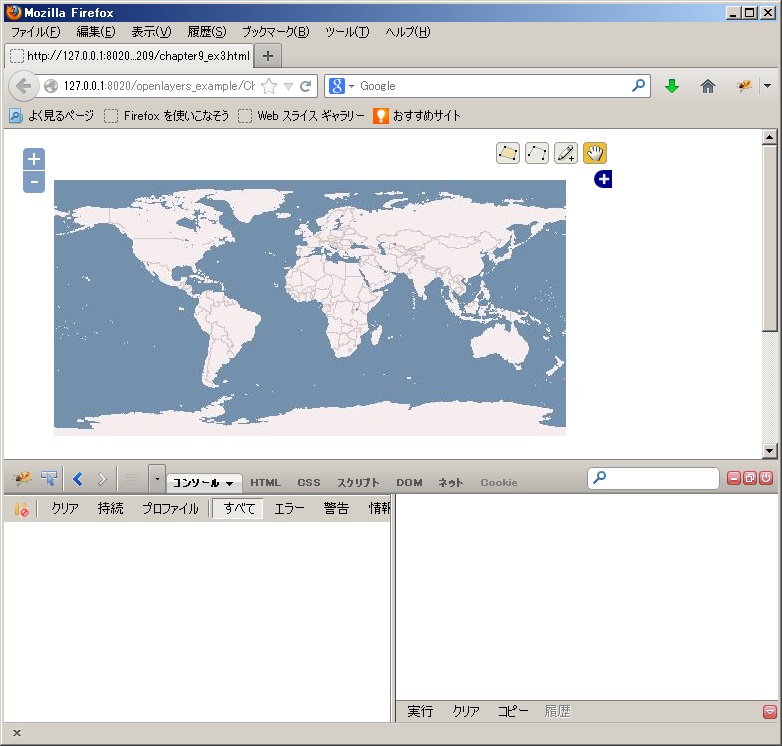
のように表示されます。
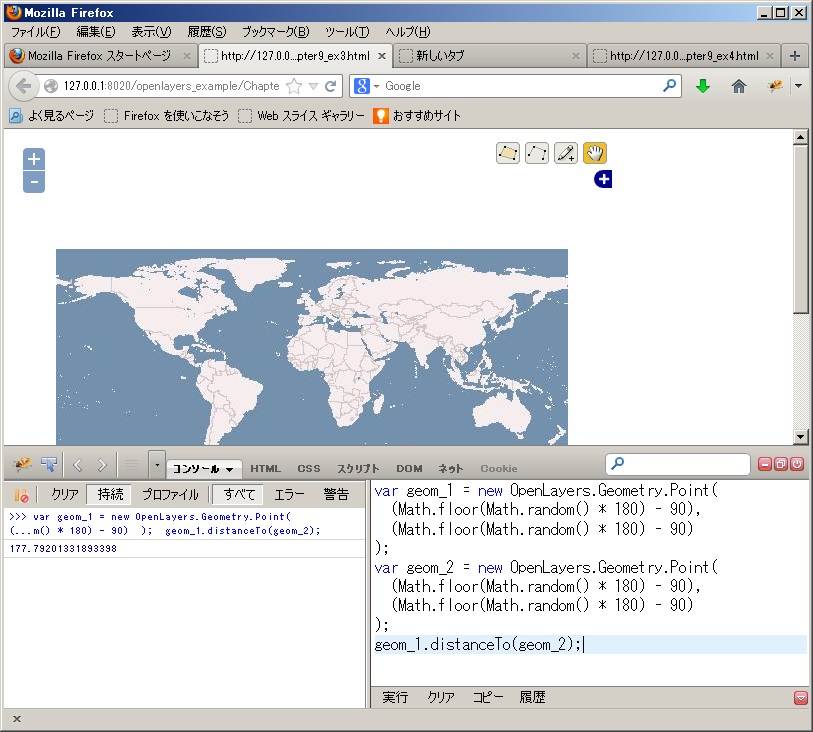
firebugのコンソールに
var geom_1 = new OpenLayers.Geometry.Point(
  (Math.floor(Math.random() * 180) - 90),
  (Math.floor(Math.random() * 180) - 90)
);
var geom_2 = new OpenLayers.Geometry.Point(
  (Math.floor(Math.random() * 180) - 90),
  (Math.floor(Math.random() * 180) - 90)
);
geom_1.distanceTo(geom_2);
ようにgeom_1とgeom_2が追加され、geom_1とgeom_2の距離が表示されます。
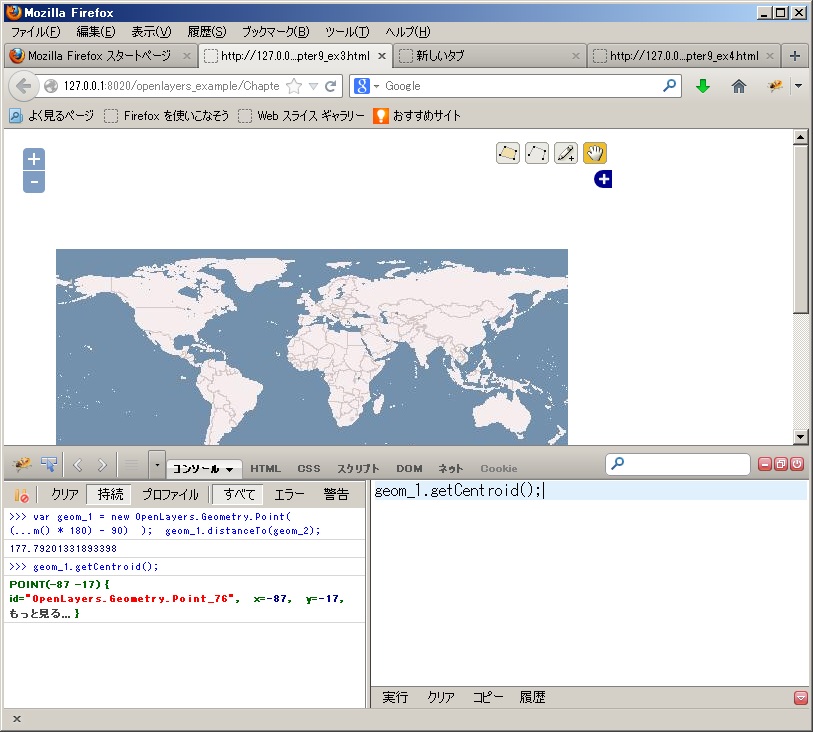
次にfirebugのコンソールに、
geom_1.getCentroid();
ようにgeom_1の重心(中心)の座標が表示されます。geom_1とgeom_2のpointはrandamに生成しているので、jpeg画像と同じ経度緯度にはならないです。
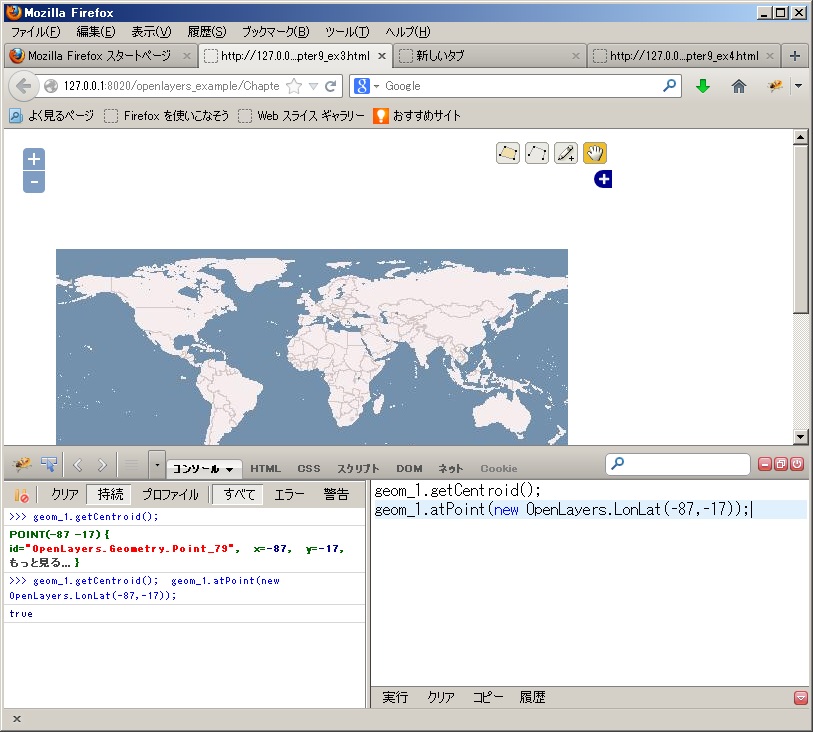
次にfirebugのコンソールに、
geom_1.atPoint(new OpenLayers.LonLat(-87,-17));
このようにpointが正しければtrueが戻ってきます。
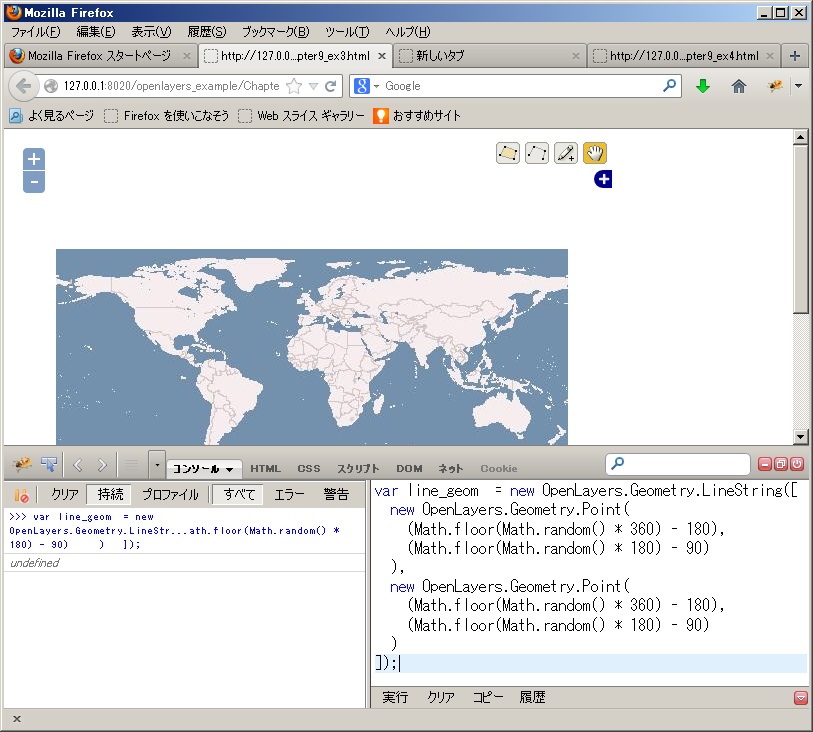
最後にlineを書いてみましょう。
firebugのコンソールに、
var line_geom  = new OpenLayers.Geometry.LineString([
  new OpenLayers.Geometry.Point(
    (Math.floor(Math.random() * 360) - 180),
    (Math.floor(Math.random() * 180) - 90)
  ),
  new OpenLayers.Geometry.Point(
    (Math.floor(Math.random() * 360) - 180),
    (Math.floor(Math.random() * 180) - 90)
  )
]);
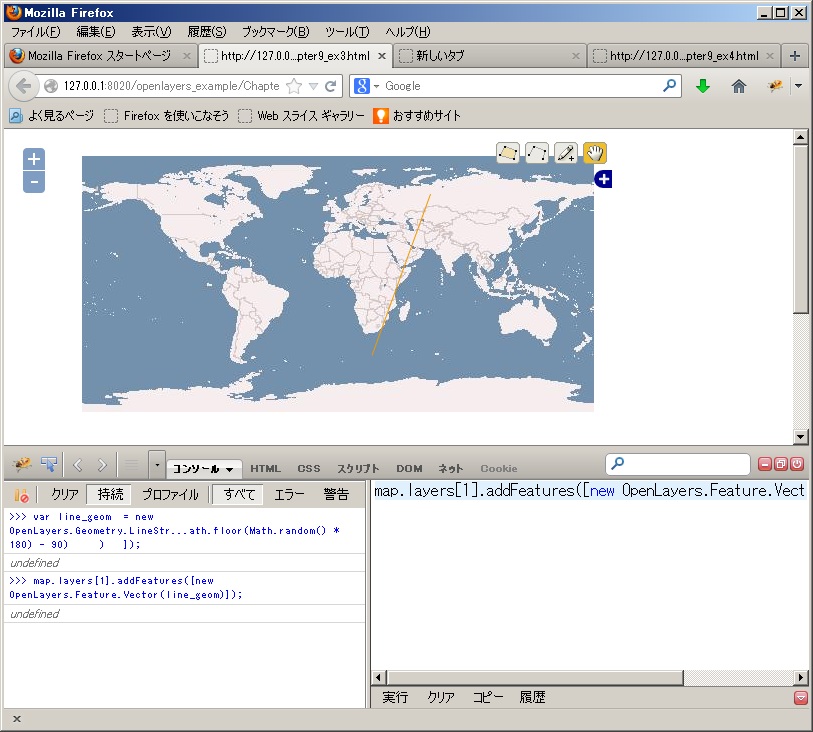
のようにLineStringが作成されます。これをmapで2点間のlineを書くには、
map.layers[1].addFeatures([new OpenLayers.Feature.Vector(line_geom)]);
のようにLineを書く事ができます。
今回のまとめ
OpenLayersの簡単なGeometry classとFeature classについて学びました。(ちょい手抜きの部分もありますが。。。) 多くのmethodがあるので、いろいろ他のmethodについてtryしてみてください。
次回は、Geometry classのsubclassについて基本を学んでいきます。
また、本tutorialは、htmlやCSSやJavaScriptの基本的なことはある程度理解している前提で今後も話を進めていきます。また、誤字、脱字、spell間違いや勘違いも多々出てくると考えられます。
それは違うじゃん!!とかいろんな意見をいただければと思います。
そこんところ ヨロシク~~!!

最近のコメント