OpenLayersを使ってみる。[Chapter 59]
Web Map Applicationの機能追加について[Chapter 58] に引き続き、proxy hostを使ったWeb Map Applicationの作成について学んでいきます。
この章以降は、
-
ゼロからFlickrを使用して、Web Map Applicationを構築する。 → 今回はここ
-
Applicationの配置と開発することの意味について議論する。
-
OpenLayers Library fileを作成する方法について。
について順番に学んでいきます。
OpenLayers 2.10 Beginner's Guideなる書籍の章立てにあわせて、OpenLayersの使い方を学んでいきます。
Proxy hostを使ったrela time data
いままではflickr_data.kmlデータはthird party siteのものです。そしてダウンロードするで利用することができました。
ここでは行うことは、リアル・タイムのデータにアクセスすることです。
これをするために、ProxyHostを使用する必要があります。
ProxyHostは、http://blog.godo-tys.jp/2013/08/17/3755/で学びました。本質的に私たちに要求するように(proxyして働いて)あるserver side scriptに要求することにより、AJAXのドメイン要求制約の裏をかく方法です。
getting dynamic data
1. 単に2つのcodeを加えるだけで、proxyを使うことができます。
2. 最初に、私たちは、proxyhostのURLを定義する必要があります。
それはCGI scriptであり、python scriptです。
CGI scriptは、C:¥ms4w¥apps¥openlayers-2.12¥examples¥proxy.cgiを使います。
proxy.cgiを使用する場合は、必ずpythonのinstallが必要です。今回はpython2.7.2をここからversion.2.7.5をdownloadしてinstallしました。
今回は、ms4wを使っているので、C:¥ms4w¥Apache¥cgi-binにproxy.cgiをcopyしておきます。
各自環境でProxyHostのURLを変更して、ProxyHostを指定してください:
OpenLayers.ProxyHost='/cgi-bin/proxy.cgi?url=';
今回使用するproxy.cgiは以下のpythonのcodeになります。
また、Windows環境で動かすので、proxy.cgiの1行目を#!C:/Python27/python.exe -uに変更しておきます。pythonの位置については各自の環境に合わせてください。
[python]
#!C:/Python27/python.exe -u
"""This is a blind proxy that we use to get around browser
restrictions that prevent the Javascript from loading pages not on the
same server as the Javascript. This has several problems: it’s less
efficient, it might break some sites, and it’s a security risk because
people can use this proxy to browse the web and possibly do bad stuff
with it. It only loads pages via http and https, but it can load any
content type. It supports GET and POST requests."""
import urllib2
import cgi
import sys, os
# Designed to prevent Open Proxy type stuff.
allowedHosts = ['www.openlayers.org', 'openlayers.org',
'labs.metacarta.com', 'world.freemap.in',
'prototype.openmnnd.org', 'geo.openplans.org',
'sigma.openplans.org', 'demo.opengeo.org',
'www.openstreetmap.org', 'sample.azavea.com',
'v2.suite.opengeo.org', 'v-swe.uni-muenster.de:8080',
'vmap0.tiles.osgeo.org', 'www.openrouteservice.org',
'maps.wien.gv.at', 'api.flickr.com']
method = os.environ["REQUEST_METHOD"]
if method == "POST":
qs = os.environ["QUERY_STRING"]
d = cgi.parse_qs(qs)
if d.has_key("url"):
url = d["url"][0]
else:
url = "http://www.openlayers.org"
else:
fs = cgi.FieldStorage()
url = fs.getvalue(‘url’, "http://www.openlayers.org")
try:
host = url.split("/")[2]
if allowedHosts and not host in allowedHosts:
print "Status: 502 Bad Gateway"
print "Content-Type: text/plain"
print
print "This proxy does not allow you to access that location (%s)." % (host,)
print
print os.environ
elif url.startswith("http://") or url.startswith("https://"):
if method == "POST":
length = int(os.environ["CONTENT_LENGTH"])
headers = {"Content-Type": os.environ["CONTENT_TYPE"]}
body = sys.stdin.read(length)
r = urllib2.Request(url, body, headers)
y = urllib2.urlopen(r)
else:
y = urllib2.urlopen(url)
# print content type header
i = y.info()
if i.has_key("Content-Type"):
print "Content-Type: %s" % (i["Content-Type"])
else:
print "Content-Type: text/plain"
print
print y.read()
y.close()
else:
print "Content-Type: text/plain"
print
print "Illegal request."
except Exception, E:
print "Status: 500 Unexpected Error"
print "Content-Type: text/plain"
print
print "Some unexpected error occurred. Error text was:", E
[/python]
3. 次に、Flickrのurlをproxy host中の許可されたホスト変数に加える必要があります。
proxy.cgiを編集して、Flickr URLをallowedHosts(OpenLayersによって提供されるファイルのトップの近くの)のリストに加えます。
最後のアイテムの後にコンマを加えて、次のように、'api.flickr.com'をリストに加えます。
allowedHosts=[…, 'api.flickr.com']
4. 最後に、vector layerが指すURLを変更します。
Vector layerの中のprotocol objectでは、urlを変更し、URL呼び出しに追加される追加のGET変数を指定するparamsオブジェクトを加える必要があります。
この場合、Formatとtagのparamsを指定します。
例としては、
protocol: new OpenLayers.Protocol.HTTP({
                url: 'http://api.flickr.com/services/feeds/geo/',
      params: {'format':'kml', 'tags':'bird'},
のように修正します。
5. 以上で完了です。これでreal timeでdataをloadすることができます。
Proxy hostを使ったWeb Map Application code
Proxy hostを使って、Flickr dataをloadする簡単なexample codeを作成してみましょう。以下のcodeを入力します。
保存先は、c:¥ms4w¥apache¥htdocs¥openlayer2_12¥chapter11¥にしておきます。
ファイル名は、chapter11_ex4_proxy_host.htmlで保存します。
[html]
<!DOCTYPE html>
<html lang=’ja’>
<head>
<meta charset=’utf-8′ />
<script type=’text/javascript’ src=’http://localhost/openlayers/OpenLayers.js’></script>
<script src="http://maps.google.com/maps/api/js?sensor=false"></script>
<script type=’text/javascript’>
var map;
var vector_layer;
function init() {
//specify proxyhost
OpenLayers.ProxyHost = ‘/cgi-bin/proxy.cgi?url=’;
//Create a map with an empty array of controls
map = new OpenLayers.Map(‘map_element’);
//Create a base layer
var google_map = new OpenLayers.Layer.Google(
‘Google Layer’,
{}
);
map.addLayer(google_map);
//Add vector layer
vector_layer = new OpenLayers.Layer.Vector(‘Flickr Data’, {
projection : new OpenLayers.Projection(‘EPSG:4326′),
protocol : new OpenLayers.Protocol.HTTP({
url : ‘http://api.flickr.com/services/feeds/geo/’,
params : {
‘format’ : ‘kml’,
‘tags’ : ‘bird’
},
format : new OpenLayers.Format.KML({
extractAttributes : true,
extractStyles : true
})
}),
strategies : [new OpenLayers.Strategy.Fixed(), new OpenLayers.Strategy.Cluster()]
});
map.addLayer(vector_layer);
//Let’s style the features
//Create a style object to be used by a StyleMap object
var vector_style = new OpenLayers.Style({
‘fillColor’ : ‘#669933′,
‘fillOpacity’ : .8,
‘fontColor’ : ‘#f0f0f0′,
‘fontFamily’ : ‘arial, sans-serif’,
‘fontSize’ : ‘.9em’,
‘fontWeight’ : ‘bold’,
‘label’ : ‘${num_points}’,
‘pointRadius’ : ‘${point_radius}’,
‘strokeColor’ : ‘#aaee77′,
‘strokeWidth’ : 3
},
//Second parameter contains a context parameter
{
context : {
num_points : function(feature) {
return feature.attributes.count;
},
point_radius : function(feature) {
return 9 + (feature.attributes.count)
}
}
});
var vector_style_select = new OpenLayers.Style({
‘fillColor’ : ‘#cdcdcd’,
‘fillOpacity’ : .9,
‘fontColor’ : ‘#232323′,
‘strokeColor’ : ‘#ffffff’
})
//Create a style map object and set the ‘default’ intent to the
var vector_style_map = new OpenLayers.StyleMap({
‘default’ : vector_style,
‘select’ : vector_style_select
});
//Add the style map to the vector layer
vector_layer.styleMap = vector_style_map;
//Add a select feature control
var select_feature_control = new OpenLayers.Control.SelectFeature(vector_layer, {
hover : true
})
map.addControl(select_feature_control);
select_feature_control.activate();
//Functions to call for the select feature control
function on_select_feature(event) {
//Store a reference to the element
var info_div = document.getElementById(‘photo_info_wrapper’);
//Clear out the div
info_div.innerHTML = ”;
//Store the clusters
var cluster = event.feature.cluster;
//Loop through the cluster features
for (var i = 0; i < cluster.length; i++) {
//Update the div with the info of the photos
info_div.innerHTML += "<strong>" + cluster[i].attributes.name + "</strong><br />" + "<img src=’" + cluster[i].style.externalGraphic + "’ />" + cluster[i].attributes.Snippet + "<br /><hr />";
}
}
//on unselect function
function on_unselect_feature(event) {
//Store a reference to the element
var info_div = document.getElementById(‘photo_info_wrapper’);
//Clear out the div
info_div.innerHTML = ”;
}
vector_layer.events.register(‘featureselected’, this, on_select_feature);
vector_layer.events.register(‘featureunselected’, this, on_unselect_feature);
if (!map.getCenter()) {
map.zoomToMaxExtent();
}
}
</script>
</head>
<body onload=’init();’>
<div id=’map_element’ style=’width: 600px; height: 400px;’></div>
<div id=’photo_info_wrapper’></div>
</body>
</html>
[/html]
今回は、proxy hostを
//specify proxyhost
OpenLayers.ProxyHost = '/cgi-bin/proxy.cgi?url=';
のように追加します。
次に、vector layerを追加します。
//Add vector layer
vector_layer = new OpenLayers.Layer.Vector('Flickr Data', {
	projection : new OpenLayers.Projection('EPSG:4326'),
	protocol : new OpenLayers.Protocol.HTTP({
		url : 'http://api.flickr.com/services/feeds/geo/',
		params : {
			'format' : 'kml',
			'tags' : 'bird'
		},
		format : new OpenLayers.Format.KML({
			extractAttributes : true,
			extractStyles : true
		})
	}),
	strategies : [new OpenLayers.Strategy.Fixed(), new OpenLayers.Strategy.Cluster()]
});
map.addLayer(vector_layer);
protocol : new OpenLayers.Protocol.HTTP(…)でkmlファイルをurlとparamsから呼び出して、formatでkmlをloadします。
このurl : 'http://api.flickr.com/services/feeds/geo/'は外部ファイルがあるurl siteになります。
protocolの内部で、KML classからのformar objectをセット・アップし、それぞれのイメージに関連したattributeにアクセスすることができるように、extractAttributes : trueとします。
最後に、strategies : […]でFixed()とCluster()を設定します。
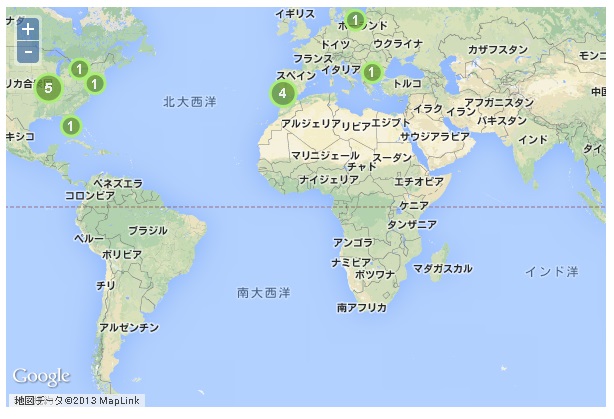
保存後、FireFoxを立ち上げて、http://localhost/openlayer2_12/chapter11/chapter11_ex4_proxy_host.htmlと入力すると、

ようにkml fileのpoint dataが読み込まれてmapに表示されます。
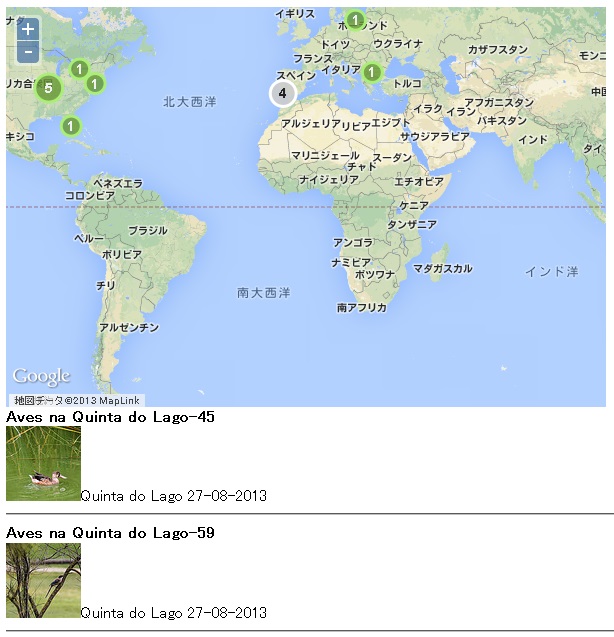
Map上のcluster pointにmouse overすると、

のようにkml fileのattributeの内容がmapの下に表示されます。
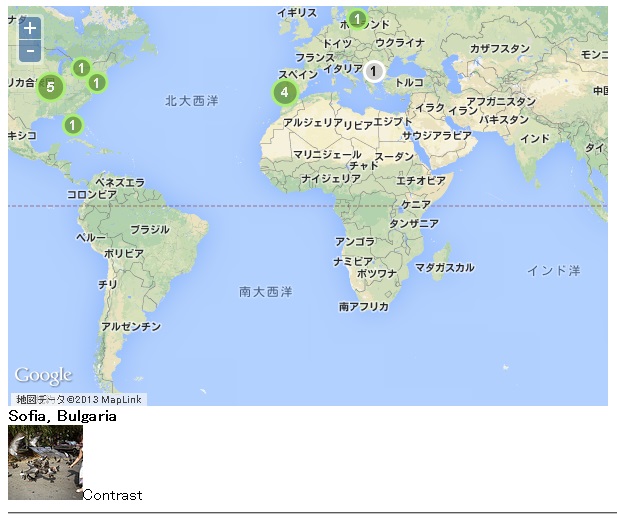
他のcluster pointにmouse overしても

のようにkml fileのattributeの内容がmapの下に表示されます。
今回のまとめ
ProxyHostを使ったWeb Map Applicationについて学びました。これを応用すれば外部サイトからkmlデータなどを呼び出してmapに描画することができるので、interactiveなApplicationを作成することができます。
次回は、今回のproxy hostを使ったreal timeのWeb Map Applicationの機能拡張を学んでいきます。
また、本tutorialは、htmlやCSSやJavaScriptの基本的なことはある程度理解している前提で今後も話を進めていきます。また、誤字、脱字、spell間違いや勘違いも多々出てくると考えられます。
それは違うじゃん!!とかいろんな意見をいただければと思います。
そこんところ ヨロシク~~!!

最近のコメント