OpenLayersを使ってみる。[Chapter 60]
Proxy Hostを使ったreal time dataの使い方について[Chapter 59] に引き続き、Web Map Applicationの機能追加をやってみます。
この章で、OpenLayers Tutorialのexample codeはすべて終了します。
この章以降は、
-
ゼロからFlickrを使用して、Web Map Applicationを構築する。 → 今回はここ
-
Applicationの配置と開発することの意味について議論する。
-
OpenLayers Library fileを作成する方法について。
について順番に学んでいきます。
OpenLayers 2.10 Beginner's Guideなる書籍の章立てにあわせて、OpenLayersの使い方を学んでいきます。
Proxy hostを使ったrela time data
前章のProxy Hostを使ったreal time dataの使い方について[Chapter 59] では、リアル・タイムのデータにアクセスするためにproxy hostを使いました。
しかし、kmlを呼び出す際にtags : birdとhard cordingしているため、他のtagsに変更ができません。そこで、汎用性を持たせるために、tagsに値を任意で指定できるように変更してみましょう。
htmlへの値のinputは
<div id='input_wrapper' style='position:absolute; left:610px; top:0;'>
	<input type='text' id='input_tags' value='bird' />
	<input type='button' id='input_submit' value='Show Data' />
</div>
</html>
で行い、show data buttonをclickすることでPOSTされます。
tagsの変更ができるWeb Map Application code
Proxy hostを使って、Flickr dataをloadして、tagsを任意に変更する簡単なexample codeを作成してみましょう。以下のcodeを入力します。
保存先は、c:¥ms4w¥apache¥htdocs¥openlayer2_12¥chapter11¥にしておきます。
ファイル名は、chapter11_ex5_final.htmlで保存します。
[html]
<!DOCTYPE html>
<html lang=’ja’>
<head>
<meta charset=’utf-8′ />
<script type=’text/javascript’ src=’http://localhost/openlayers/OpenLayers.js’></script>
<script src="http://maps.google.com/maps/api/js?sensor=false"></script>
<script type=’text/javascript’>
var map;
var vector_layer;
function init() {
//specify proxyhost
OpenLayers.ProxyHost = ‘/cgi-bin/proxy.cgi?url=’;
//Create a map with an empty array of controls
map = new OpenLayers.Map(‘map_element’);
//Create a base layer
var google_map = new OpenLayers.Layer.Google(
‘Google Layer’,
{}
);
map.addLayer(google_map);
//Add vector layer
vector_layer = new OpenLayers.Layer.Vector(‘Flickr Data’, {
projection : new OpenLayers.Projection(‘EPSG:4326′),
protocol : new OpenLayers.Protocol.HTTP({
url : ‘http://api.flickr.com/services/feeds/geo/’,
params : {
‘format’ : ‘kml’,
‘tags’ : ‘bird’
},
format : new OpenLayers.Format.KML({
extractAttributes : true,
extractStyles : true
})
}),
strategies : [new OpenLayers.Strategy.Fixed(), new OpenLayers.Strategy.Cluster()]
});
map.addLayer(vector_layer);
//Let’s style the features
//Create a style object to be used by a StyleMap object
var vector_style = new OpenLayers.Style({
‘fillColor’ : ‘#669933′,
‘fillOpacity’ : .8,
‘fontColor’ : ‘#f0f0f0′,
‘fontFamily’ : ‘arial, sans-serif’,
‘fontSize’ : ‘.9em’,
‘fontWeight’ : ‘bold’,
‘label’ : ‘${num_points}’,
‘pointRadius’ : ‘${point_radius}’,
‘strokeColor’ : ‘#aaee77′,
‘strokeWidth’ : 3
},
//Second parameter contains a context parameter
{
context : {
num_points : function(feature) {
return feature.attributes.count;
},
point_radius : function(feature) {
return 9 + (feature.attributes.count)
}
}
});
var vector_style_select = new OpenLayers.Style({
‘fillColor’ : ‘#cdcdcd’,
‘fillOpacity’ : .9,
‘fontColor’ : ‘#232323′,
‘strokeColor’ : ‘#ffffff’
})
//Create a style map object and set the ‘default’ intent to the
var vector_style_map = new OpenLayers.StyleMap({
‘default’ : vector_style,
‘select’ : vector_style_select
});
//Add the style map to the vector layer
vector_layer.styleMap = vector_style_map;
//Add a select feature control
var select_feature_control = new OpenLayers.Control.SelectFeature(vector_layer, {
})
map.addControl(select_feature_control);
select_feature_control.activate();
//Functions to call for the select feature control
function on_select_feature(event) {
//Store a reference to the element
var info_div = document.getElementById(‘photo_info_wrapper’);
//Clear out the div
info_div.innerHTML = ”;
//Store the clusters
var cluster = event.feature.cluster;
//Loop through the cluster features
for (var i = 0; i < cluster.length; i++) {
//Update the div with the info of the photos
info_div.innerHTML += "<strong>" + cluster[i].attributes.name + "</strong><br />" + "<img src=’" + cluster[i].style.externalGraphic + "’ />" + cluster[i].attributes.Snippet + "<br /><hr />";
}
}
//on unselect function
function on_unselect_feature(event) {
//Store a reference to the element
var info_div = document.getElementById(‘photo_info_wrapper’);
//Clear out the div
info_div.innerHTML = ”;
}
vector_layer.events.register(‘featureselected’, this, on_select_feature);
vector_layer.events.register(‘featureunselected’, this, on_unselect_feature);
if (!map.getCenter()) {
map.zoomToMaxExtent();
}
//——————————-
//HTML Related
//——————————-
//Function to be called that updates vector layer when submit
// is clicked
function update_vector_layer() {
//Change URL based on input tags
vector_layer.protocol.options.params['tags'] = document.getElementById(‘input_tags’).value
//Refresh the layer with the new params
vector_layer.refresh();
//Lastly, clear out the div that shows photo info
document.getElementById(‘photo_info_wrapper’).innerHTML = ”;
}
//Add events to HTML input element
document.getElementById(‘input_submit’).addEventListener(‘click’, update_vector_layer, false);
}
</script>
</head>
<body onload=’init();’>
<div id=’map_element’ style=’width: 600px; height: 400px;’></div>
<div id=’input_wrapper’ style=’position:absolute; left:610px; top:0;’>
<input type=’text’ id=’input_tags’ value=’bird’ />
<input type=’button’ id=’input_submit’ value=’Show Data’ />
</div>
<div id=’photo_info_wrapper’></div>
</body>
</html>
[/html]
今回は、ProxyHostを使ったreal time dataの使い方について[Chapter 59] のcodeに追加しています。
まず、tagの変更があった場合、Vector layerをreloadして新しいdataを追加するために、
//-------------------------------
//HTML Related
//-------------------------------
//Function to be called that updates vector layer when submit
//  is clicked
function update_vector_layer() {
	//Change URL based on input tags
	vector_layer.protocol.options.params['tags'] = document.getElementById('input_tags').value

	//Refresh the layer with the new params
	vector_layer.refresh();

	//Lastly, clear out the div that shows photo info
	document.getElementById('photo_info_wrapper').innerHTML = '';
}
のようにfunction update_vector_layerを追加して、'tags'でtextboxの値を読み取ります。
そして、HTMLが入力されたときのeventを
//Add events to HTML input element
document.getElementById('input_submit').addEventListener('click', update_vector_layer, false);
のように定義します。
また、HTMLで
<div id='input_wrapper' style='position:absolute; left:610px; top:0;'>
	<input type='text' id='input_tags' value='bird' />
	<input type='button' id='input_submit' value='Show Data' />
</div>
</html>
のように<div>ブロックにtextとbuttonを配置して、tagsを読み込むようにします。
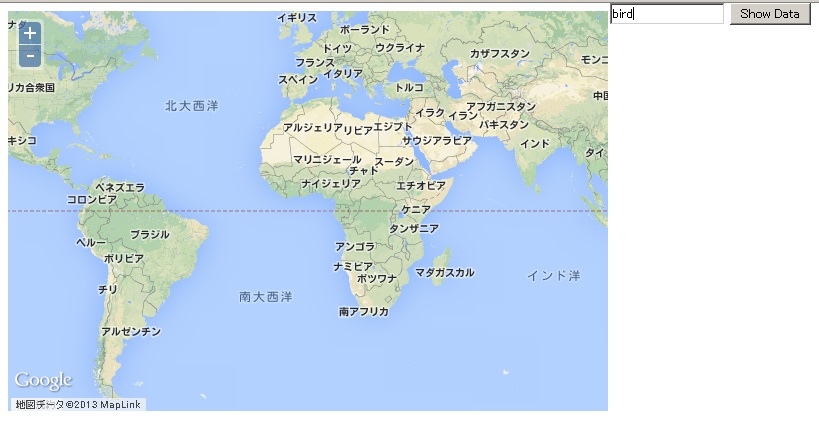
保存後、FireFoxを立ち上げて、http://localhost/openlayer2_12/chapter11/chapter11_ex5_final.htmlと入力すると、

ようにmapの右上にtextとbuttonに表示されます。
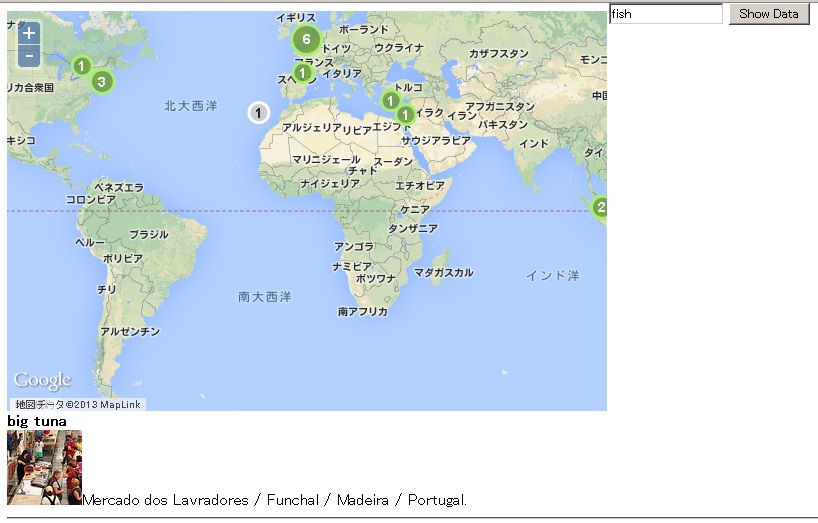
textにfishと入力して、show data buttonをclickして、cluster makerをclickすると、

のようにkml fileのattributeの内容がmapの下に表示されます。
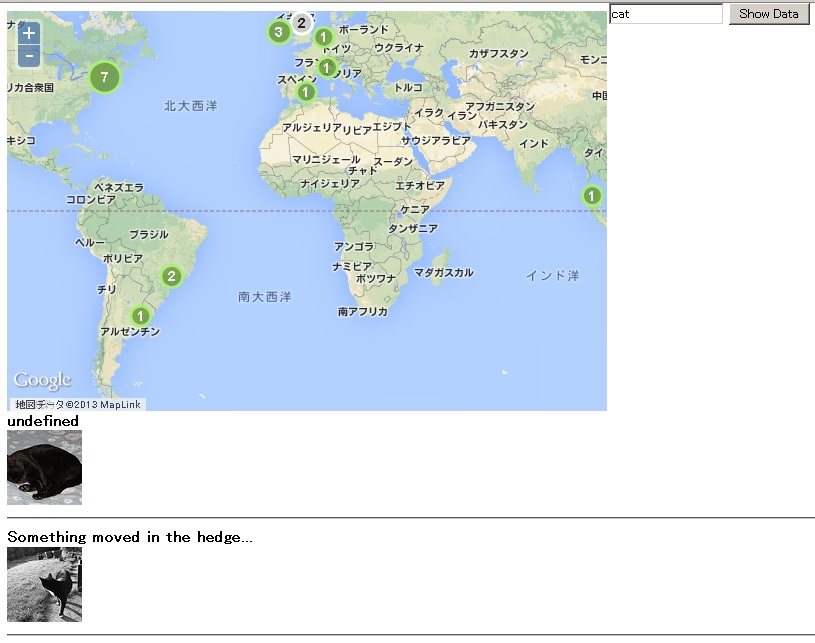
また、textにcatと入力して、show data buttonをclickして、cluster makerをclickすると、

のようにkml fileのattributeの内容がmapの下に表示されます。
今回のまとめ
tagsの変更をinteractiveに変更し、ProxyHostを使ったWeb Map Applicationについて学びました。これを応用すれば外部サイトからkmlデータなどを呼び出してmapに描画することができるので、interactiveなApplicationを作成することができます。
次回は、OpenLayers Library fileの作成にを学んでいきます。
いよいよ最後の章です。時間がかかりましたが、とりあえずはTutorialの終了となります。
また、本tutorialは、htmlやCSSやJavaScriptの基本的なことはある程度理解している前提で今後も話を進めていきます。また、誤字、脱字、spell間違いや勘違いも多々出てくると考えられます。
それは違うじゃん!!とかいろんな意見をいただければと思います。
そこんところ ヨロシク~~!!

最近のコメント