OpenLayersを使ってみる。[Chapter 24]
OpenLayersのControlのPanelsについて[Capter 23] に引き続き、OpenLayersのControl Creating own controlsについての基本を学んでおきます。
OpenLayers 2.10 Beginner's Guideなる書籍の章立てにあわせて、OpenLayersの使い方を学んでいきます。
OpenLayers Controlについての詳細は、OpenLayers.Control を参考にしてください。
Creating own Control
OpenLayersで用意されているものでなく、独自のcontrolを作成してみます。
作成するcontrolはbuttonです。
-
Button control classについて
-
カスタム機能を持つButton controlの作成
-
Panelにbuttonを追加
-
Custom control作成
Custom buttonを作成する前に、button controlのpropertiesとfunctiosについて見ておきます。
OpenLayers.Control.Button
Button classには、typeとdisplayClass propertyの2つについて知っておく必要があります。
Button properties
| Name | Type | Description | Default Value |
|---|---|---|---|
| type | {Integer} | This is an integer which represents the type of control this button is. This is part of what we discussed earlier—the button types. OpenLayers.Control.TYPE_BUTTON is represented by a 1, OpenLayers.Contro.lTYPE_TOGGLE is represented by a 2, and OpenLayers.Control.TYPE_TOOL is represented by a 3. By default, as this is a OpenLayers.Control.TYPE_BUTTON control, the value is 1. However, by changing the value of this property you can change its control type. You can specify the type by either using the {Integer} number (such as 2), or use the built in constant name. The constant name starts with OpenLayers.Control and is followed by the control type (such as OpenLayers.Control.TYPE_BUTTON). Both methods accomplish the same thing, but using the constant name is cleaner and easier to read. | 1 (or OpenLayers.Control.TYPE_BUTTON) |
| displayClass | {String} | This string will specify the name of the CSS class the button will be assigned. An example would be 'olControlMyButton'. Whatever class you specify, OpenLayers automatically adds in 'ItemInactive' at the end of it. If it is a toggle-able button, then 'ItemActive' will be added to the end when the button is active. We'll cover this in great detail in the next chapter. If this property is not defined, it will get the default value of 'olControlButtonItem' (with 'Inactive' or 'Active' added at the end). | olControlButton ItemInactive |
Button functions
関数の主な用途の1つは、我々はbutton objectをインスタンス化するときに使います。
-
trigger(): Control buttonが(それはOpenLayers.Control.TYPE_BUTTONコントロールであると仮定して)clickされた時に、この関数が呼び出されます。Buttonを定義しない場合、Buttonをclickしても何も起こりません。Button objectの作成中にpropertyを渡す必要があります。インスタンス化でこれを定義するために、新たな外部の関数を作成します。そして new openLayers.Control.Buttonがcallされ、その後はトリガーとして、その関数の名前を参照します。
Exampleとして、
-
var my_func = function(){ alert( 'Stop clicking me'); }
-
var my_button = new OpenLayers.Control.Button({ trigger: my_func });
なtriggerです。
Custum buttonの作成
簡単なcontrolのtypeであるTYPE_BUTTONについて作成します。
Custom buttonとしては
-
Buttonにstyleを与えるためにdisplayClassを指定する(オプション)
-
関数を作成し、trigger関数として設定
-
Button panelを追加した後、mapにそのpanelを追加
Creating a simple button example code
Panelを使ったexample codeは、以下のcodeを入力します。
保存先は、c:¥ms4w¥apache¥htdocs¥openlayers2_12¥chapter6¥にしておきます。
ファイル名は、chapter6_ex6_custom_button.htmlで保存します。
[html]
<!DOCTYPE html>
<html lang=’ja’>
<head>
<meta charset=’utf-8′ />
<script type=’text/javascript’ src=’http://localhost/openlayers/OpenLayers.js’></script>
<style type=’text/css’>
/*Custom Button*/
.olControlCustomButtonItemInactive {
background: #22dd22;
border: 5px solid #202020;
cursor: pointer;
height: 28px;
width: 28px;
}
</style>
<script type=’text/javascript’>
var map;
function init() {
map = new OpenLayers.Map(‘map_element’, {});
//Create a base layer
var wms_base = new OpenLayers.Layer.WMS(
‘OpenLayers WMS’,
‘http://vmap0.tiles.osgeo.org/wms/vmap0′, {
layers : ‘basic’
}, {});
map.addLayer(wms_base);
var custom_button_func = function() {
//Get a random coordinate from -90 to 90
var random_lon = Math.floor(Math.random() * 180) – 90;
var random_lat = Math.floor(Math.random() * 180) – 90;
if (map.layers[0].opacity === 1) {
//If the layer opacity is 1 (fully opaque), then change it and zoom
map.layers[0].setOpacity(.5);
map.setCenter(new OpenLayers.LonLat(random_lon, random_lat), 3);
} else {
//If the layer opacity is anything but 1, change it and zoom
map.layers[0].setOpacity(1);
map.setCenter(new OpenLayers.LonLat(random_lon, random_lat), 3);
}
};
var custom_button = new OpenLayers.Control.Button({
displayClass : ‘olControlCustomButton’,
trigger : custom_button_func,
})
var control_panel = new OpenLayers.Control.Panel({});
//Add some controls to it
control_panel.addControls([custom_button])
//Add the Panel to the map
map.addControl(control_panel);
control_panel.moveTo(new OpenLayers.Pixel(450, 0));
if (!map.getCenter()) {
map.zoomToMaxExtent();
}
}
</script>
</head>
<body onload=’init();’>
<div id=’map_element’ style=’width: 500px; height: 500px;’></div>
<div id=’panel_div’></div>
</body>
</html>
[/html]
上記codeで、
var custom_button_func = function() {
	//Get a random coordinate from -90 to 90
	var random_lon = Math.floor(Math.random() * 180) - 90;
	var random_lat = Math.floor(Math.random() * 180) - 90;

	if (map.layers[0].opacity === 1) {
		//If the layer opacity is 1 (fully opaque), then change it and zoom
		map.layers[0].setOpacity(.5);
		map.setCenter(new OpenLayers.LonLat(random_lon, random_lat), 3);
	} else {
		//If the layer opacity is anything but 1, change it and zoom
		map.layers[0].setOpacity(1);
		map.setCenter(new OpenLayers.LonLat(random_lon, random_lat), 3);
	}
};
の部分でcustom_button_func関数を作成します。
これは、randomに表示位置を変える関数となっています。
Panelは
<div id='panel_div'></div>
で定義した<div>に書き込まれます。
Button controlは
var custom_button = new OpenLayers.Control.Button({
	displayClass : 'olControlCustomButton',
	trigger : custom_button_func,
})
で定義して、OpenLayers.Control.Buttonを定義します。
control_panelに
var control_panel = new OpenLayers.Control.Panel({});

//Add some controls to it
control_panel.addControls([custom_button])
custom_buttonを追加します。
最終的に、
//Add the Panel to the map
map.addControl(control_panel);
でcontrolを追加します。
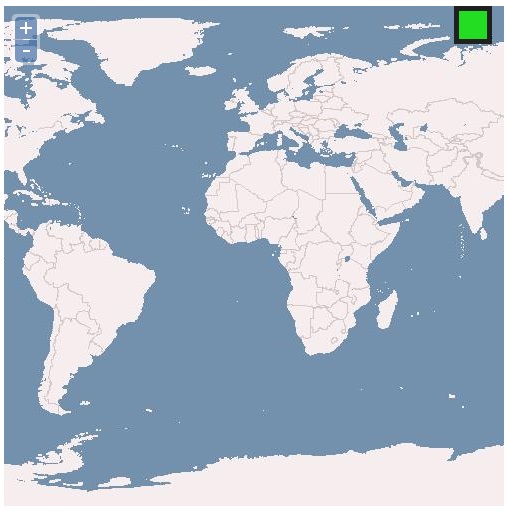
保存後、FireFoxを立ち上げて、http://localhost/openlayers2_12/chapter6/chapter6_ex6_custom_button.htmlと入力して、FireFoxを開くと

な感じでbrowser上にmapと定義したpanelが表示されます。
mapの右上にcustom buttonが表示されます。
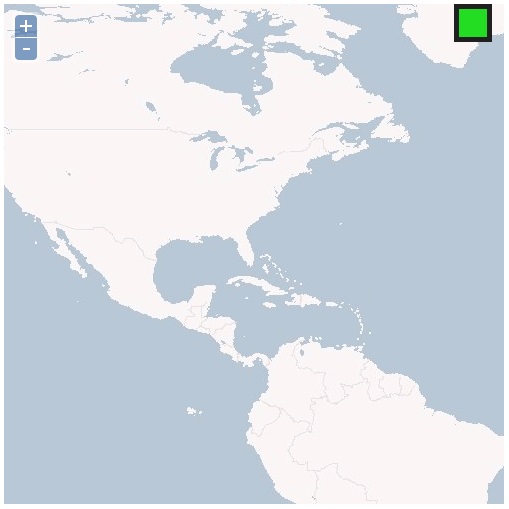
のようにmapのcenterがrandomに移動します。
他のcontrol type
前の例で、TYPE_BUTTON typeのbutton controlを作成しました。
このTYPE_BUTTON typeをtoggle typeに変更することは簡単です。また、TYPE_TOOLとTYPE_TOGGLE button typeについては、OpenLayersのControlのPanelsについて[Chapter 23]を参考にしてください。
他のcontrol typeを作成するプロセス
Button control typesを作成するプロセスは、
-
Control objectを作成します(どちらかのBase Control classを拡張するか、または、Button controlを作成することのどちらか)とタイプを指定。
-
特定のイベントが発生したときに呼び出される特定の関数(例えば、controlがアクティブになったとき)
Button controlを作成した後、controlがアクティブになったときに関数を呼び出します。そしてその際にeventHandlersを指定します。
今回のまとめ
OpenLayersによるControl Custom controlの基本について学びました。
次回は、引き続きOpenLayers.ControlのeventHandlersについて学んでいきます。
また、本tutorialは、htmlやCSSやJavaScriptの基本的なことはある程度理解している前提で今後も話を進めていきます。また、誤字、脱字、spell間違いや勘違いも多々出てくると考えられます。
それは違うじゃん!!とかいろんな意見をいただければと思います。
そこんところ ヨロシク~~!!


最近のコメント