PythonでGeoSpatial Dataの表示と保存_2[Chapter 14]
PythonでGeoSpatial Dataの表示と保存_`[Chapter 13] に引き続き、GeoSpatial DataのVector dataのWKTの保存の基本を学んでおきます。
本tutorialは、Python Geospatial Developmentを参考にして、実践的に使えるPythonでGeoSpatialの使い方を学んでいくものです。
また、本Blog中のsource code等に関しては、あくまでも参考としてください。なにがあっても責任とれませんので。
そこんところ、ヨロシク~~!!
準備
PythonでGeoSpatial Dataの読み書きについて_1[Chapter 8] でPythonとGeoSpatialに関するlibraryが設定できているもとして進めていきます。
ShapefileからWKT作成・保存
Shapefileはbinary dataで直接みることができません。WKTはテキストベースの文字列のため、Editor等でみることができます。
ここでは、Shapefileを読み込んで、WKTとしてファイルに出力してみます。
Sample data
sample dataのTM_WORLD_BORDERS-0.3からView raw fileをclickしてdownload、その後解凍しておきます。
私の開発環境では、f:¥shapefile_dataのfolderを作成して、解凍したfileをcopyしておきます。
WKT作成・保存 code
とりあえず、Ediorで下記のcodeを入力して、保存します。
保存先はf:¥python_example¥chapter_5¥ folderにsaveAsText.pyで保存します。
[python]
# saveAsText.py
import os,os.path,shutil
import osgeo.ogr
inPath = "f:¥¥shapefile_data¥¥TM_WORLD_BORDERS-0.3.shp"
shapefile = osgeo.ogr.Open(inPath)
layer = shapefile.GetLayer(0)
outPath = "f:¥¥shapefile_data¥¥country-wkt-files"
if os.path.exists(outPath):
shutil.rmtree(outPath)
os.mkdir(outPath)
for i in range(layer.GetFeatureCount()):
feature = layer.GetFeature(i)
name = feature.GetField("NAME")
geometry = feature.GetGeometryRef()
f = file(os.path.join(outPath, name + ".txt"), "w")
f.write(geometry.ExportToWkt())
f.close()
[/python]
注意)上記codeで¥は全角ですので、半角にするかもしくは、バックスラッシュに置き換えてください。
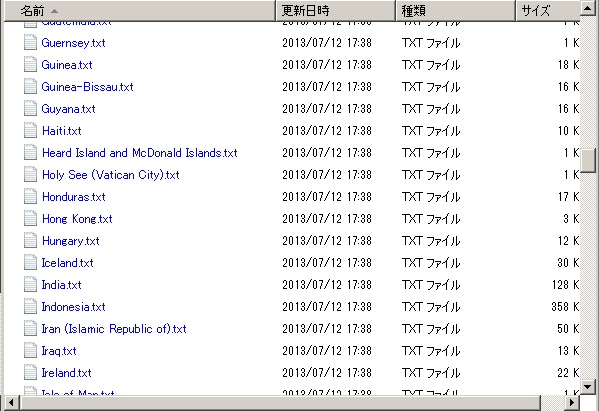
PyScriptでrunすると、何も起こりませんが、f:¥shapefile_data¥country-wkt-filesのfolderが作成されて、246カ国のWKTデータファイルができあがります。

な感じで国名でtxtが作成されていることが確認できます。
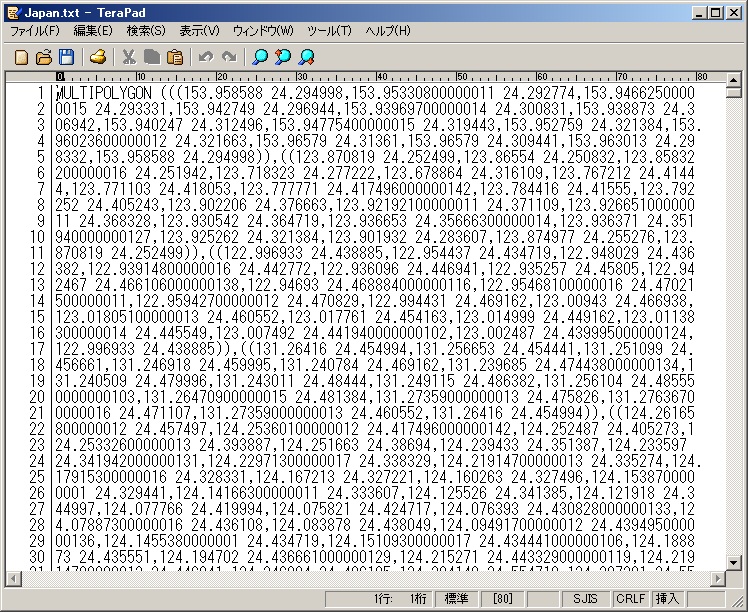
でMulti polygonで出力されていることが確認できます。
codeの説明
changeDatum.pyが何を行っているのかを順にみていきましょう。
1.library 読み込み
import os,os.path,shutil import osgeo.ogr
2.入力Shapefileのopen
inPath = "f:¥¥shapefile_data¥¥TM_WORLD_BORDERS-0.3.shp" shapefile = osgeo.ogr.Open(inPath) layer = shapefile.GetLayer(0)
Shapefileのlayerはただ一つのlayerですから、GetLayer(0)となります。
3.出力先folderの作成
outPath = "f:shapefile_datacountry-wkt-files"
if os.path.exists(outPath):
    shutil.rmtree(outPath)
os.mkdir(outPath)
4.WKTの作成とfile出力
for i in range(layer.GetFeatureCount()):
    feature = layer.GetFeature(i)
    name = feature.GetField("NAME")
    geometry = feature.GetGeometryRef()

    f = file(os.path.join(outPath, name + ".txt"), "w")
    f.write(geometry.ExportToWkt())
    f.close()
国数でloopして、fileにgeometry.ExportToWkt()でWKT テキストデータを書き込んでいきます。
順番にみていくと理解できると思います。
今回のまとめ
今回は、PythonでのGeoSpatial dataのShapefileからWKTとして保存を行いました。
次回は、PythonでShapely libraryのgeometryについて学んでみます。
また、本tutorialは、Python Scriptの基本的なことはある程度理解している前提で今後も話を進めていきます。また、誤字、脱字、spell間違いや勘違いや翻訳間違いなど多々出てくると考えられます。
それは違うじゃん!!とかいろんな意見をいただければと思います。
そこんところ ヨロシク~~!!


Comments are closed.